Showing posts with label Carl Zeiss Jena. Show all posts

Tuesday, September 2, 2025

Repairing a Carl Zeiss Jena Biotar 58mm f/2 Lens


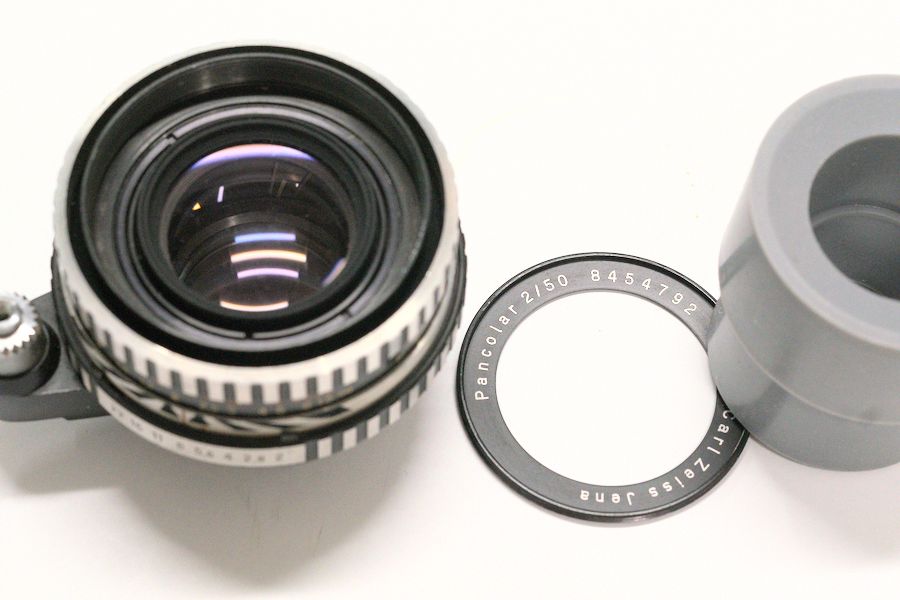
The Carl Zeiss Jena Biotar 58mm f/2 lens is a legendary lens. It consists of 6 elements in 4 groups and it was produced from the late 1930's to the early 1960's (before it was superseded by the equally legendary Pancolar 50mm f/1.8). The Biotar is famous for its swirly bokeh. After WWII, it was cloned in Russia under the name "Helios 44-2" which is now one of the most famous vintage lenses.
 

There are a few different versions of the Biotar with different aperture mechanisms. Mine is the last version with a semi-automatic aperture with 10 aperture blades. When I received it, the focus was rather stiff and it had oil on the aperture blades. It turned out that it is rather easy to service.

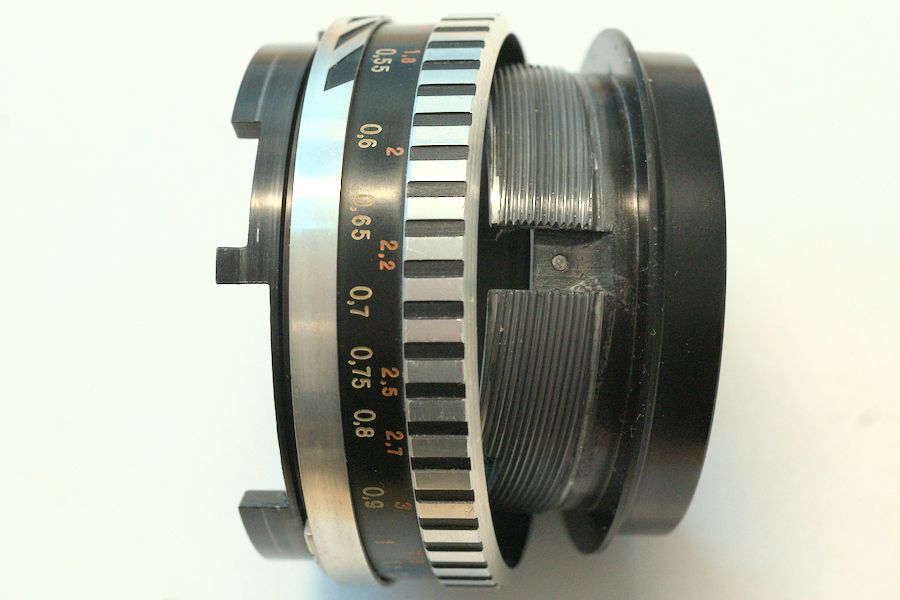
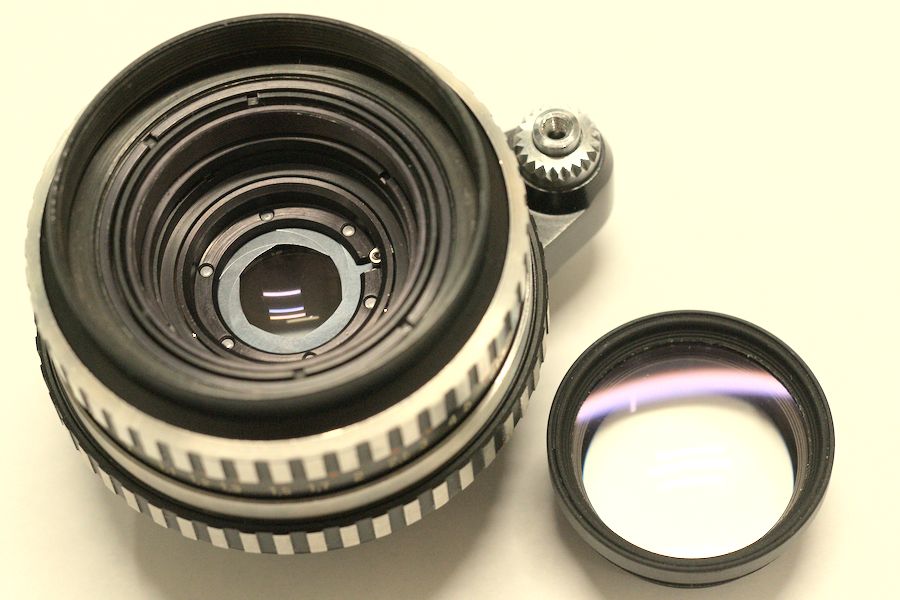
The whole optical system (with the aperture mechanism) can be separated by opening a single ring on the backside, using a lens spanner.


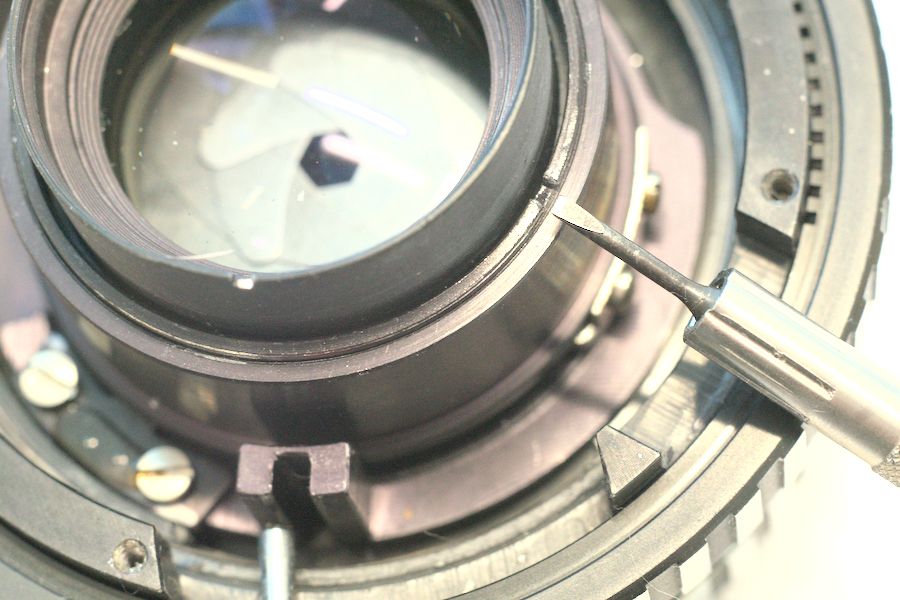
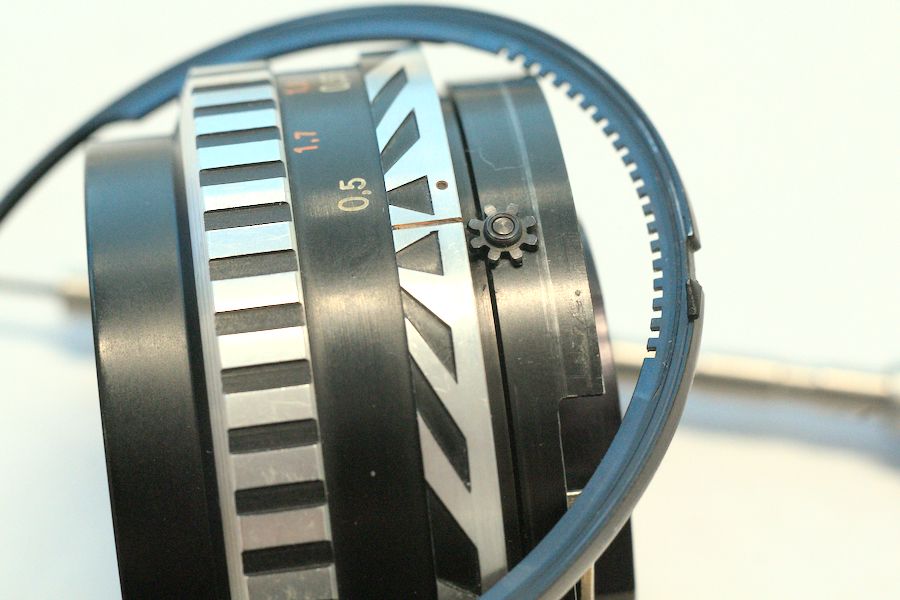
Now, set the focus to infinity and remove this screw (which is setting the focus limits).


Now, slowly(!) focus closer and closer, to the minimum (of 0.6m) and beyond, until the inner helicoid becomes able to rotate freely. For my lens this happened when the "m" was at the focus marker.


For the following, I keep the focus ring at the "m" mark. As seen from the front, I rotate the inner piece (slowly!) to see when it becomes loose and remember exactly where this happens. For this, I remember the position of the "upside-down" U-shaped piece (which is at the top in the picture below).


For my lens, this piece becomes loose when the"upside-down U-shape" is in the middle between the 2m and the 2.5m marks. This is exactly where it has to be inserted later!!


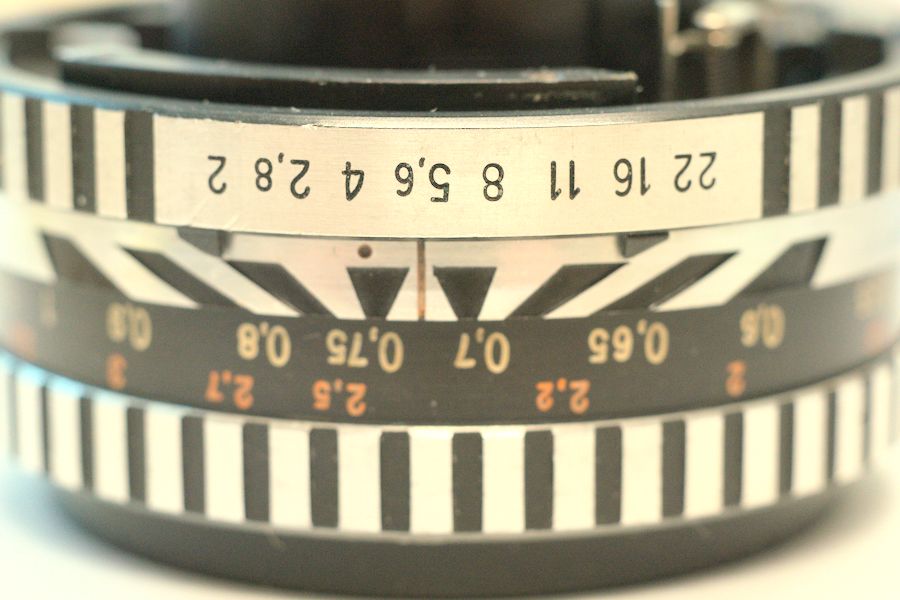
Now, I document the exact position of the focus ring. For this purpose, starting at the "m", I turn the focus ring clockwise, passing the "0.6m" up to the infinity mark. Then I continue to rotate the ring clockwise, and I check how far it goes before it comes to a stop. For my lens, this is exactly one more full turn.
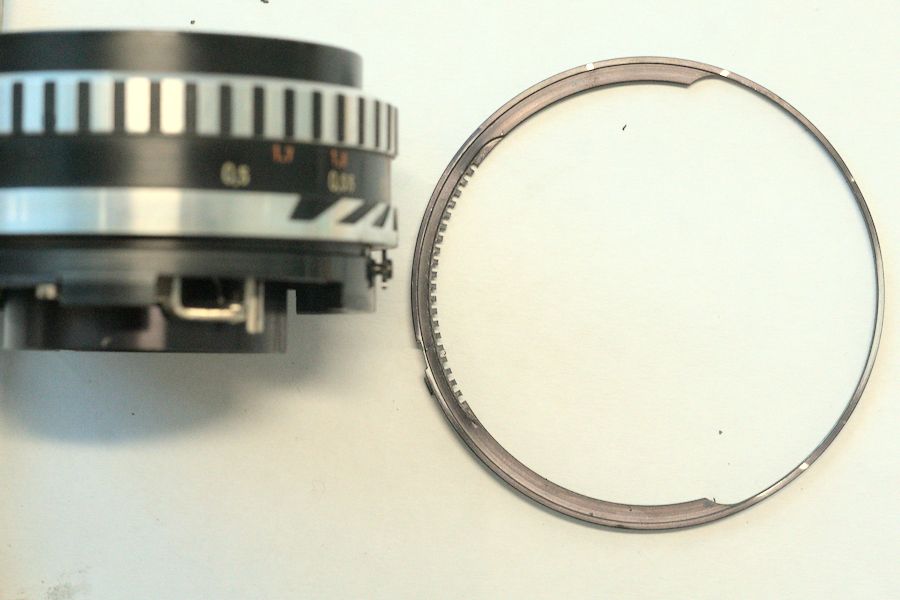
Now I rotate it back by one turn (so it's again at the correct infinity position) - from there I keep turning, passing the 0.6m mark, until I reach the "m" mark (where the inner helicoid separated). From here, I continue to rotate it, until it comes out (for my lens after almost 7 full additional turns).


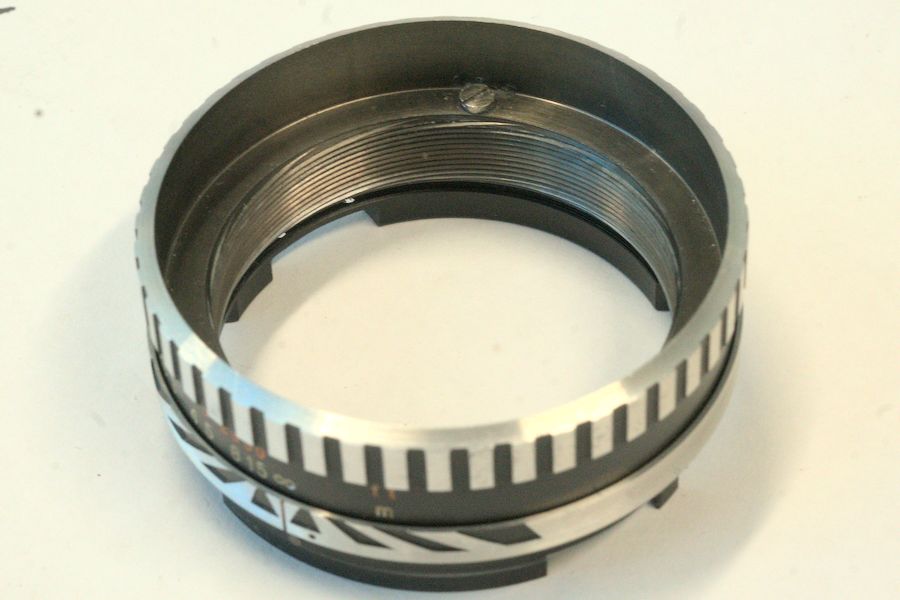
Now I got both helicoids separated - and, in the picture, already cleaned.

If you want to clean some of the glass, now is a good time to do that. You can access the rear element, by opening the ring on the back side.


To access the front glass and the aperture, you can remove the name ring with a rubber tool.


Open the outer ring (with a lens spanner) to extract the whole front glass.


Open the inner ring to access the front lens. 


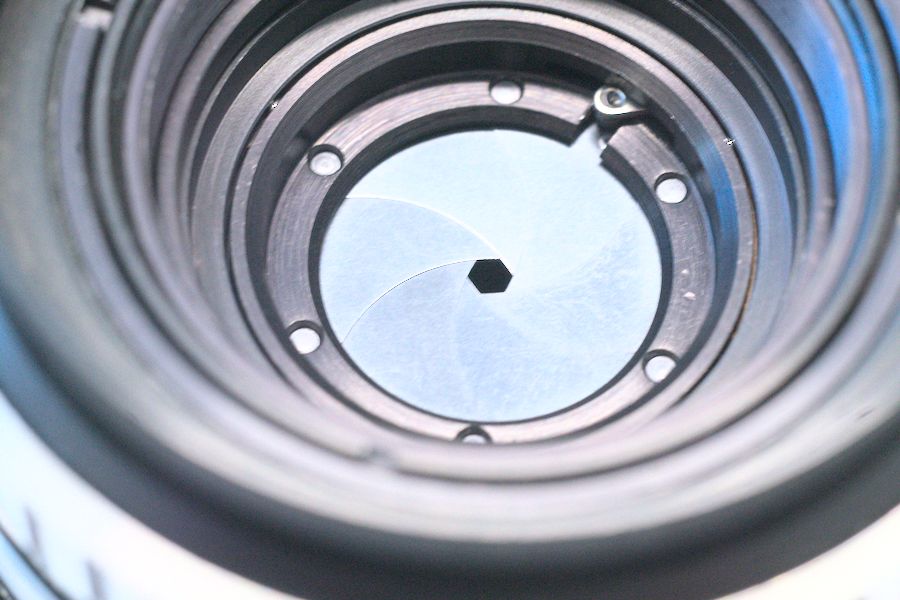
At this point you can also access the aperture blades. I cleaned these in-place (without further disassembly).


When this is done, the lens can be reassembled. Since you remembered the exit points of the helicoids (you did! - didn't you?) you can put everything back together in the reverse order as described before. (Of course, with a touch of helicoid grease on the helicoids!)


And here it is:


Almost as good as new. Clean on the inside and outside and freshly lubed. Ready for taking great pictures. That's why we did this!

More of my lens repair tutorials can be found here.

Thursday, July 31, 2025

Repairing a Carl Zeiss Jena Sonnar 3.5/135mm Lens


The Carl Zeiss Jena Sonnar 135mm f/3.5 lens is a compact tele lens, made of 4 elements in 3 groups. It is famous for being rather sharp, with a minimum focus distance of only 1m. This version was made in the 1970's and features multi-coating.

When I got this, the focus was somehow stiff and there were traces of oil on the aperture blades, so I decided to clean it. Here, I document the individual steps in pictures.

For the first steps, no tools are required. Everything can be unscrewed by hand.


These are the pieces so far. Now, we need a screwdriver to take off the back piece.


Removing the two helicoid keys and (of course!) take a precise note where they came off!!!


Removing the screw that sets the limits for the focus ring.


Remember where you started (I started at minimum distance of 1m).


And count the number of turns before the helicoid comes off.


For the coarse helicoid, note exactly the point where it comes off (it has multiple entry points!)


Clean and relube the helicoids.


And reassemble eeverything.


I don't have pictures of the remaining steps. But at this point, you just have to undo what you did in the first steps.

More of my lens repair tutorials can be found here.

Thursday, February 27, 2025

Repairing a Carl Zeiss Jena Pancolar 50mm f/2.0 lens


The Carl Zeiss Jena Pancolar 50mm f/1.8 is a legendary lens, famous for its color rendering and for its sharpness, wide open. It features a double Gauss design with 6 elements in 5 groups. But this article is about the earlier version with f/2. It was announced in 1960 as an improvement of the equally legendary Carl Zeiss Jena Biotar 58mm f/2 (the one that was cloned in Russia as the "Helios 58mm f/2) which increases the diagonal angle of view from 40 to 46 degrees. It featured 6 elements in 4 groups and uses lanthanum flint glass. There exist different versions of this lens, the earlier ones had a focus ring with rubber, while the later ones were in the "Zebra" style. A very detailed description of the development of this lens can be found on this incredible web page (in German, but Google will translate it).

My piece was made between 1967-70, it is the "Zebra" version with Exakta mount. It came with super stiff focus and aperture, but I knew that those would be very easy to fix - and it turned out that it was even easier than I expected.


General Recommendations

First, you need tools like a lens spanner and (good!) screw drivers. For cleaning the metal surfaces, I am using cotton swabs and high percentage Isopropyl Alcohol (I got 91%) for all metal surfaces and the glass - and lighter fluid (Zippo) for cleaning the old grease in the helicoids). You also need helicoid grease.

I strongly recommend to take photos of every single step along the way. Whenever I take off a piece, I first try to understand how it was connected and what it did, and then I clean immediately all of its accessible surfaces with alcohol-soaked cotton swabs. 


Disassembly

I tried to document the whole process in great detail through the pictures below.
Starting from the front side.


At this point, you already have access to the aperture blades.


At this stage I had some trouble since two of the four screws didn't want to come out. But I soaked them in alcohol and lighter fluid and waited a few days. Suddenly the third screw came out... and two days later the last one too. (Sometimes it pays off to be patient!)


My lens spanner had the wrong angle to get into this slot. But I was able to get the ring out using two screwdrivers.


With the ring removed, you can extract the rear glass piece - and with a lens spanner you can take out the last element.


When the aperture ring is removed you can see the little gear that moves the ring with the depth-of-field pointer.


This ring is rather thin. Be careful not to bend it when removing it.
Before removing the gear: remember exactly in which orientation it was sitting there - take a photo (and/or look closely on my photo above).

Back to the front side. First take out the piece with the aperture - and then the focusing helicoids.


Now is a good time to clean the aperture blades. I was able to do so, without further disassembly of the aperture.


Take out the helicoid key (and, before you do so, make sure to set the focus to a defined value - e.g. to the minimum focus distance).


While holding the focus ring fixed extract the inner helicoid (slowly!) and make sure you note where exactly it exits. Mine did so when the slot for the helicoid key was exactly at the red 2.2ft mark (see picture).


At this point, I rotate the focus ring to infinity - then I remove the screw (at the top in the picture) that sets the limits for the focus. Now, I first check how much further the focus ring can be inserted before it comes to a stop: In my case I can rotate it beyond infinity by  1 1/4 turns. Then I bring it back to the original infinity setting. From there, it takes 6 1/4 turns before it comes out. For your lens, this may be different - so, make sure to take pictures, sketches, and notes!


Everything is disassembled and cleaned!


Just three little 'drops' (much less than a water droplet!) for the outer helicoid (= the focus ring). Of course, the exact amount depends on the type of grease.


When the focus ring is in the correct position, put back the limit-screw. Then the inner helicoid can be greased and inserted.


Putting back the helicoid key,


the aperture piece,


the gear and the ring with the d.o.f. pointer,


and the aperture ring.


All glass surfaces are cleaned.


Suddenly, these two pieces cam out. It turns out that (unlike almost any other lens that I ever encountered) the clicked aperture ring is not using a ball, but this pin and the metal piece as a spring. The latter has to be inserted into the grove of the aperture ring.


And that's it! A wonderful lens is back in great shape! 


Images

Here are a few impressions of my first shots that I took with this lens on a Sony A7Rii. Some are wide  open, some at f/5.6. 


I really like the rendering of the out-of-focus regions.

More of my lens repair tutorials can be found here.