

Today I am sharing how I built two clocks, related to "Back to the Future"
Introduction
The final scenes in "Back to the Future" when Doc Brown is hanging from the clock tower are a reference to Harold Lloyd's movie "Safety Last".


This is already foreshadowed in the opening sequence in Doc's garage, with one of the clocks showing Harold Lloyd hanging from the minute hand (at 30 sec. in this video clip).
Fun fact: This clock was also used in the background in one of the Seinfeld episodes.

Another clock is seen in BTTF part 3, in the photo that shows Doc and Marty in 1885 in front the clock that is being built for the clock tower.

Some creative person in the forums at therpf.com had photoshopped this image and removed the hands of the clock, so that it can be used for building an actual clock.
So, these are two good ideas, resulting in two nice projects.
Doc & Marty Clock
The "Doc & Marty" clock is built into a wooden 8" x 10" picture frame that I found at a thrift store. I removed the glass and the back panel and cut new 8" x 10" back panel from 3/16" plywood. I started with an image of Doc & Marty that someone had posted at therpf.com, which I cropped (to fit 8" x 10") and which I photoshopped (or, actually "gimp-ed") to remove minor jpeg artifacts in the white area. Here is my version of the photo, in case you would like to create your own clock:

I ordered a clock movement with hands that roughly match the style of the tower clock with a 2" minute hand and a 1 1/2" hour hand.

The 8" x 10" photo is glued to the backing board using Liquitex Gel Medium. This works well, as it gives you enough time to adjust the photo before it dries. Make sure you apply only a thin layer of Gel Medium, cover the image with wax paper, and remove all the air bubbles. I also strongly recommend to cover the photo with a layer of wax paper and use e.g. a stack of heavy books to add pressure while it dries over night.

Then I drilled a 5/16" hole to screw in the clock movement, and added a hanger piece that I made with a laser cutter (four layers of 3/16" plywood)


The last step is to clip-off the second hand (which does not belong on a clock tower), so that I could use the center piece. Then the whole piece is fixed in the picture frame - and that's it!
Here is my clock:


Harold Lloyd Clock
To build the Harold Lloyd clock, I used another image that was posted in post #28 in this forum. That image is, however, rather small (682x1024 pixels), and it has significant jpeg artifacts. Using Gimp, I scaled it up to 2024x1348 pixels and used Gaussian blur to carefully remove all noise and jpeg artifacts. Then I inserted the image in a new image file with a size of 2100x1650 pixels. When the latter is printed on 11" x 14" cardstock, the clock face has a size of 8 5/8" x 13 1/8" - when adding a 5/16" border, the clock has a total size of 9 1/4" x 13 3/4" which is very close to the original clock. At the bottom of this page is the (150 dpi) image that I used for printing on 11"x14".
The Harold Lloyd figure should be printed on cardstock, such that its height is 3.7".

A piece of plywood was cut to 9 1/4" x 13 3/4", the corners sanded, and the border was painted light gray before thecardstock was glued with Liquitex gel medium (again: add a layer of wax paper, remove the air bubbles, and apply pressure over night as it dries). A 5/16" hole is then drilled for the clock movement.


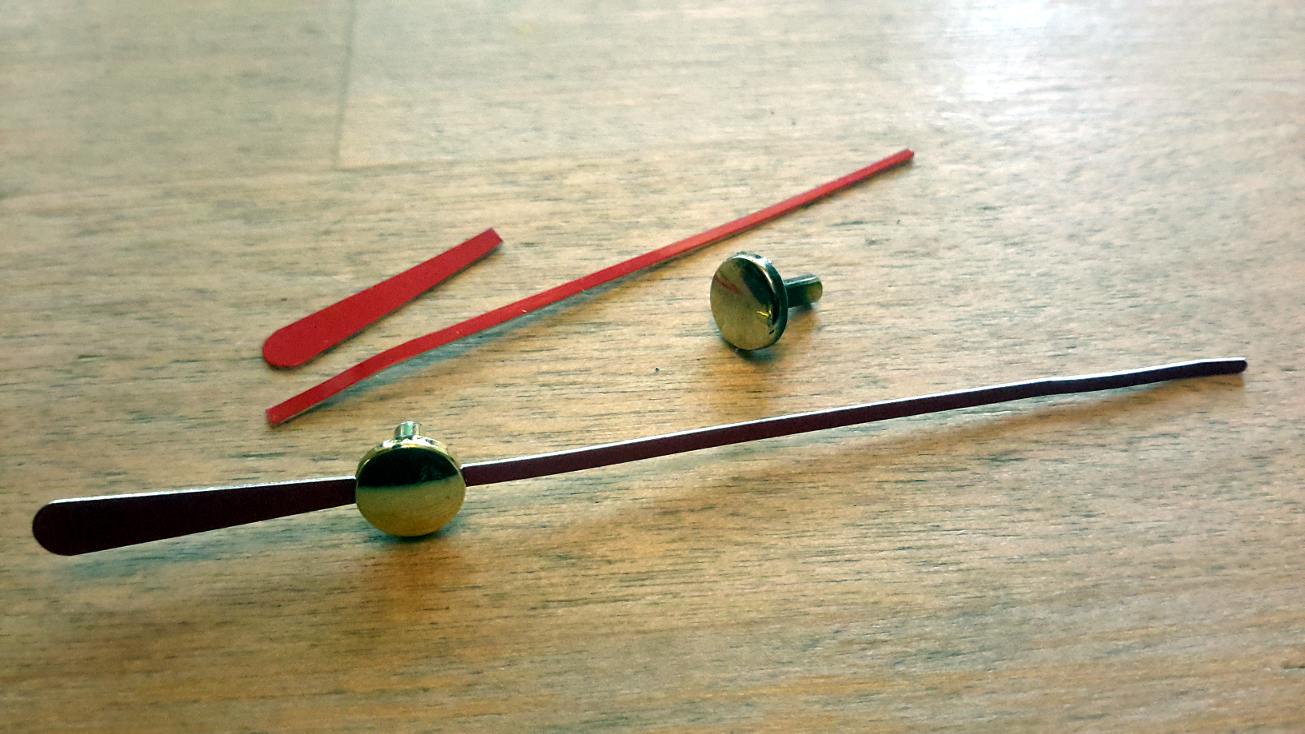
I ordered a clock movement with simple, wide rectangular hands which are much longer than what I needed. This enabled me to cut the hands exactly at the desired length, and use the remaining pieces to practice gluing the holder for the Harold Lloyd figure. The hands can easily be cut using household scissors.

This was one piece where I had to become a little creative: How to build a holder for the figure, so it can freely rotate. And: the holder has to be very lightweight, so it does not damage the clock movement. I decided to use a tiny piece of a wooden dowel, painted black with a permanent marker. In one side, I drill a hole for a M1.7mm screw and the other side is glued to the minute hand. It turns out that the UHU glue does a reasonable job in glueing the wooden dowel to the metallic minute hand: I could tear it apart if I wanted, but it is strong enough for all practical purposes.


The hanger on the backside was made using the same pieces that I used for the Marty&Doc clock (see the image above).
That's it! It's fun to watch little Harold moving in circles...
That's it! It's fun to watch little Harold moving in circles...

More BTTF Clocks/Watches
Some time, after building these clocks, I built a replica of the "Twin Pines Mall" sign, with a functioning clock - and I wrote code to display BTTF watchfaces on the cheap LiliyGo T-Watch 2020.
Related
My other blog posts on BTTF-related props and pieces:- Building a Flux Capacitor
- Building the Time Circuits
- Building a Hoverboard and Charger
- Building a BTTF Brick Stage (featuring the smallest Flux Capacitor)
4 comments:
Hello, thank you for making this blog post! I want to build a Harold Lloyd clock like yours and I was wondering if I can purchase the higher resolution image file from you. I tried to use the one you provide here, but it looks to be a lower resolution and looks like it will print pixelaed. Thank you! And thank you so much for the detailed explanation!
Good to see fellow builders who enjoy this too. As far as the image quality is concerned, I was not aware that blogger reduces the sizes for downloads. Now, I have added the full quality image at the bottom of the page. The quality is not too good. The original image from which I started was less than half the size of this and heavily compressed. I enlarged it and smoothed the areas with visible artifacts. But I can not improve the sharpness. So, the true resolution is not 150dpi, but more like half of that. However, once this is hanging on your wall, it will just look great.
Thanks for share the image and instructions. I have made my clock!
Nice that this inspired you to build one. Maybe you could send me a photo, so I could add this here?
Post a Comment