Showing posts with label Doc Brown. Show all posts

Thursday, November 26, 2020

Building the Twin Pines Mall Clock from "Back to the Future"


Clocks are one of the main themes in "Back to the Future" - and also some of my favorite items for building replica props. Previously, I built three of those clocks, the one in the Time Circuits, the Harold Lloyd clock (as seen in the beginning of part I in Doc's house), one based on a photo featured in part III.


Part I of the movie also features another important clock which is part of the "Twin Pines Mall" sign (which, after Marty changed the timeline, became the "Lone Pine Mall").


I had this idea quite some time ago, and the electronic parts all at hand, when a posting of another build in the "Back to the Future Forever" facebook group inspired me to get this started.

Electronics (I)

The electronics is built around an Arduino Nano. 


The time is displayed on a 8x32 LED array, based on the MAX7219 driver IC - this looks rather close to the display in the original movie prop. The differences are that in the original movie prop the colon is not exactly aligned with the grid of the dot matrix, and the "AM"/"PM" displays use a smaller dot matrix). But for my purposes this is close enough.


For the real time clock (RTC), I am using the module DS3231 which I also used previously in the Time Circuits. This clock is very precise and it runs for years with a CR2032 battery. There is, however, one problem with this modul, related to the charging circuit which is supposed to be able to charge a rechargeable battery. As discussed in detail on this web page, the charging circuit would do damage to both a rechargeable battery or a non-rechargeable battery. So, the suggested solution is to simply remove a resistor (as indicated in the image) and to operate the module with a (non-rechargeable) CR2032 battery - and that's what will I do. 


I also add a light dependent resistor (LDR) to the circuit, so the clock can adjust the LED intensity based on the surrounding brightness.


My test-setup (using an Arduino Uno) works fine. 


Enclosure

The LED matrix defines the size of the unit - the enclosure is scaled accordingly to 5 1/8" x 21". The outer part of the enclosure is built like a picture frame using 3/4" thick and 3 1/2" wide pine boards, cut with a miter saw, glued, and sanded.


The additional pieces are cut with a laser cutter from 3/16" plywood and clear acrylics.


For the first time, I used the program inkscape, so I could cut the letters for "Twin Pines Mall".


Everything is painted using acrylic paints.


The pair of trees are made from two layers of 3/16" plywood plus two additional triangular pieces cut with a table saw.


This is the enclosure.


Electronics (II)

The electronics is soldered on a 6cm x 8cm PCB. First comes a sketch...


... and then the soldering.


Everything is connected...


... and inserted into the enclosure.


The Final Unit

Here it is: my "Twin Pines Mall" clock (with two Lego figures as a reference).


Monday, June 3, 2019

Building Back-to-the-Future Clocks

 
Today I am sharing how I built two clocks, related to "Back to the Future"

Introduction

The final scenes in "Back to the Future" when Doc Brown is hanging from the clock tower are a reference to Harold Lloyd's movie "Safety Last".


This is already foreshadowed in the opening sequence in Doc's garage, with one of the clocks showing Harold Lloyd hanging from the minute hand (at 30 sec. in this video clip).

Fun fact: This clock was also used in the background in one of the Seinfeld episodes.

Another clock is seen in BTTF part 3, in the photo that shows Doc and Marty in 1885 in front the clock that is being built for the clock tower.
Some creative person in the forums at therpf.com had photoshopped this image and removed the hands of the clock, so that it can be used for building an actual clock.
So, these are two good ideas, resulting in two nice projects.

Doc & Marty Clock

The "Doc & Marty" clock is built into a wooden 8" x 10" picture frame that I found at a thrift store. I removed the glass and the back panel and cut new 8" x 10" back panel from 3/16" plywood. I started with an image of Doc & Marty that someone had posted at therpf.com, which I cropped (to fit 8" x 10") and which I photoshopped (or, actually "gimp-ed") to remove minor jpeg artifacts in the white area. Here is my version of the photo, in case you would like to create your own clock:
I ordered a clock movement with hands that roughly match the style of the tower clock with a 2" minute hand and a 1 1/2" hour hand. 

The 8" x 10" photo is glued to the backing board using Liquitex Gel Medium. This works well, as it gives you enough time to adjust the photo before it dries. Make sure you apply only a thin layer of Gel Medium, cover the image with wax paper, and remove all the air bubbles. I also strongly recommend to cover the photo with a layer of wax paper and use e.g. a stack of heavy books to add pressure while it dries over night.

Then I drilled a 5/16" hole to screw in the clock movement, and added a hanger piece that I made with a laser cutter (four layers of 3/16" plywood)


The last step is to clip-off the second hand (which does not belong on a clock tower), so that I could use the center piece. Then the whole piece is fixed in the picture frame - and that's it!

Here is my clock:


Harold Lloyd Clock

To build the Harold Lloyd clock, I used another image that was posted in post #28 in this forum. That image is, however, rather small (682x1024 pixels), and it has significant jpeg artifacts. Using Gimp, I scaled it up to 2024x1348 pixels and used Gaussian blur to carefully remove all noise and jpeg artifacts. Then I inserted the image in a new image file with a size of 2100x1650 pixels. When the latter is printed on 11" x 14" cardstock, the clock face has a size of 8 5/8" x 13 1/8" - when adding a 5/16" border, the clock has a total size of 9 1/4" x 13 3/4" which is very close to the original clock. At the bottom of this page is the (150 dpi) image that I used for printing on 11"x14".
The Harold Lloyd figure should be printed on cardstock, such that its height is 3.7".

A piece of plywood was cut to 9 1/4" x 13 3/4", the corners sanded, and the border was painted light gray before thecardstock was glued with Liquitex gel medium (again: add a layer of wax paper, remove the air bubbles, and apply pressure over night as it dries). A 5/16" hole is then drilled for the clock movement.


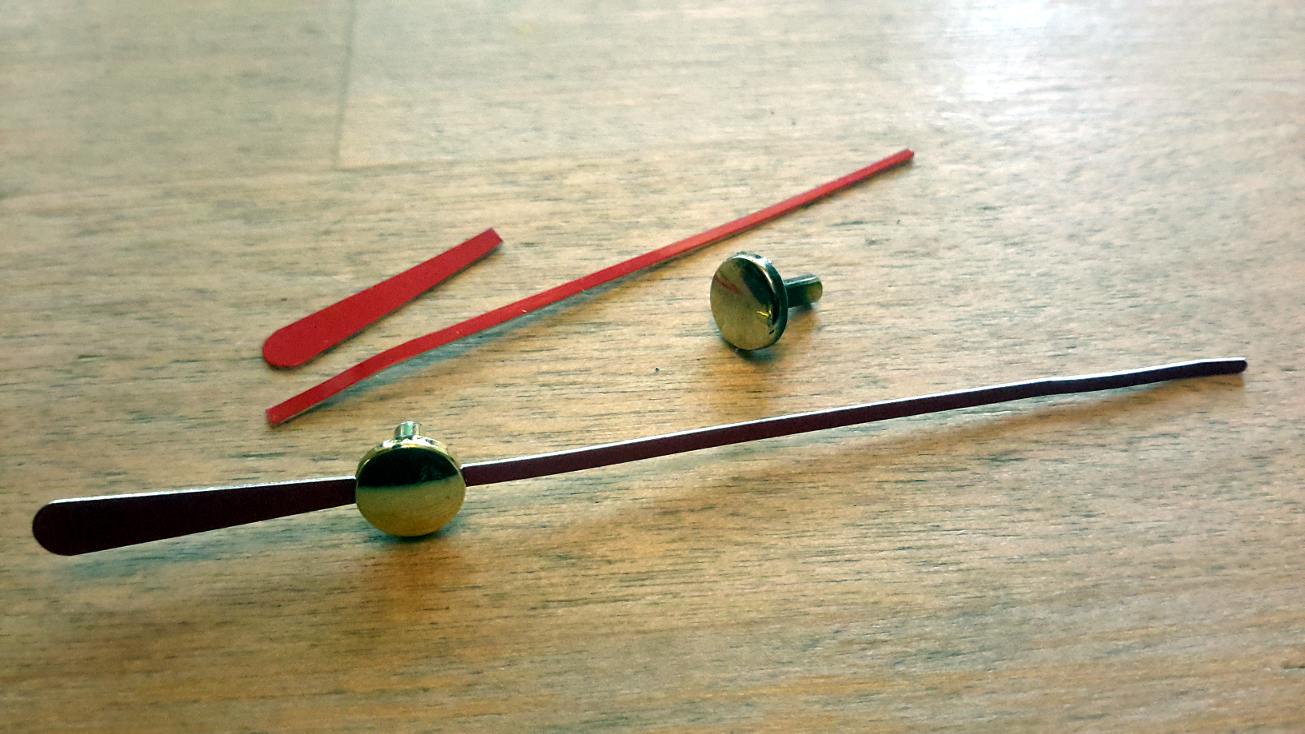
I ordered a clock movement with simple, wide rectangular hands which are much longer than what I needed. This enabled me to cut the hands exactly at the desired length, and use the remaining pieces to practice gluing the holder for the Harold Lloyd figure. The hands can easily be cut using household scissors.
This was one piece where I had to become a little creative: How to build a holder for the figure, so it can freely rotate. And: the holder has to be very lightweight, so it does not damage the clock movement. I decided to use a tiny piece of a wooden dowel, painted black with a permanent marker. In one side, I drill a hole for a M1.7mm screw and the other side is glued to the minute hand. It turns out that the UHU glue does a reasonable job in glueing the wooden dowel to the metallic minute hand: I could tear it apart if I wanted, but it is strong enough for all practical purposes. 


The hanger on the backside was made using the same pieces that I used for the Marty&Doc clock (see the image above).
That's it! It's fun to watch little Harold moving in circles... 

More BTTF Clocks/Watches

Some time, after building these clocks, I built a replica of the "Twin Pines Mall" sign, with a functioning clock - and I wrote code to display BTTF watchfaces on the cheap LiliyGo T-Watch 2020.

Related

My other blog posts on BTTF-related props and pieces:
   - Building a Flux Capacitor
   - Building the Time Circuits
   - Building a Hoverboard and Charger
   - Building a BTTF Brick Stage (featuring the smallest Flux Capacitor)
   - Building the Twin Pines Mall Clock from "Back to the Future"


Here is the image in full resolution