
The Steinheil Auto-D-Tele Quinar 1:2.8 f/135mm is a super compact tele lens, made in Germany. This piece was made around 1964/65. It has the legendary "Zebra" look, typical for German lenses of that era, and a fantastic build quality. Optically, wide open, it is at least as sharp as the Meyer-Optik Orestor 2.8/135mm (another highly-regarded legendary lens of that era) - but it has only five aperture blades, as compared to the Orestor's 15 blades.

It seems to be rather rare, but you can always find a few on eBay, where they sell, starting from $70. When I got mine, the optics were in great condition, but the focus was rather stiff and the aperture did not close. Both of these issues should be easy to deal with. From about 20-30 lenses that I work on, a non-functioning aperture was always due to oil on the blades and, as it turns out, this was also the case for this pretty piece (see below).

There is very little information on this lens on the web, and no repair tutorials. But with some experience on other German lenses from that era, I just gave it a try, and I found that it was pretty. I used the following tools:
- A lens spanner to remove the name plate (one of the first steps), to get access to the front glass element. If that is not needed, you don't need the spanner.
- Quality screwdrivers
- Cotton pads plus lighter fluid (for cleaning the aperture blades) and isopropyl alcohol (I use the 91% version) for cleaning the old grease from the focusing helicoids
The following general rules for lens repairs have worked very well for me.
- In every step, I take pictures and/or draw sketches to remember the orientation of the pieces. For things that you see clearly, a sketch may be more helpful, while pictures also document those details to which you did not pay attention.
- Immediately after separating a piece, I try to understand how it was connected, and I try to immediately reconnect it again before proceeding further.
- Whenever I remove a piece, I clean it and all newly accessible surfaces immediately with cotton pads and isopropyl alcohol, so I have not dirty/oily pieces in my storage container. For small part (screws, springs, ball bearings) I use a storage box with dividers.


This lever on the back piece is responsible for stopping down the aperture (I recommend to play with the stop-down button and the A/M switch on the back piece to understand the mechanism). In this case, I see that this lever works fine.

The lever sits in the marked slot which can be moved by hand - or with a wooden tooth pick. Doing so, openes and closes the aperture. So, I see that the aperture itself does work - the problem is only that the oily aperture blades have too much resistance, which the lever can't overcome. This was everything on the back side, now we turn to the front side of the lens.
I recommend to read everything, because you may not need to do some of the first steps - which I only found out later.

To get access to the front glass (and only for that!), the name ring can be removed using a lens spanner. Be careful, since after removing the ring, the front lens will fall out! If you don't need to access the rear of the front glass, don't remove the ring!

The front part of the lens can simply be unscrewed by hand.

These are the pieces from the front that I have so far. At this point, I cleaned the front glass, put it back, and fixed the name ring.

Now, I removed the three screws (but it turned out that loosening them would have done the job).

Then the front part can be unscrewed by hand.

Before removing the focus ring, make sure that it is set to a well-defined position - I picked infinity. After loosening the four silver screws it can be removed.

I made sure, not to rotate the messing piece, before using a screwdriver to make a little scratch (2.), to note the infinity position.
While normal screws have a single entry point, the focusing helicoids have multiple entry points. For the correct reassemble of the lens, it is therefore crucial to remember the correct one (otherwise, you will not get infinity focus). So, in the next steps, it is critical to proceed very slowly, making sure to document when the pieces separate.
While normal screws have a single entry point, the focusing helicoids have multiple entry points. For the correct reassemble of the lens, it is therefore crucial to remember the correct one (otherwise, you will not get infinity focus). So, in the next steps, it is critical to proceed very slowly, making sure to document when the pieces separate.

When the messing ring is turned counterclockwise (as seen from the front), the black helicoid (which is guided by two "helicoid keys") moves to the right. But only up to the point where the helicoid keys exit the slots - then it will turn together with the messing ring. It is very important to note where exactly this happens. So, I turn the messing ring very slowly - and take this photo, exactly at the point where the black helicoid piece exits the helicoid keys (the keys can be seen from the back side). For my lens, this happens, when my mark on the messing ring is between the "16" and "22" on the DOF scale.

Then, I hold the messing ring, and turn the black helicoid clockwise (as seen from the front), and note where exactly it exits.

It exitsa after almost half of a turn, and it turns out that somebody else has already marked this position: It exits exactly when the slot, marked with an "X" is at the place where the messing ring has another scratch. If your lens does not have marks like that, make some (and make sure that you will later not confuse the two slots)!

The black piece actually consists of two pieces (which I discovered accidentally). By pressing on the left side...

...the two pieces separate. Now, the helicoid and the aperture can be cleaned separately.

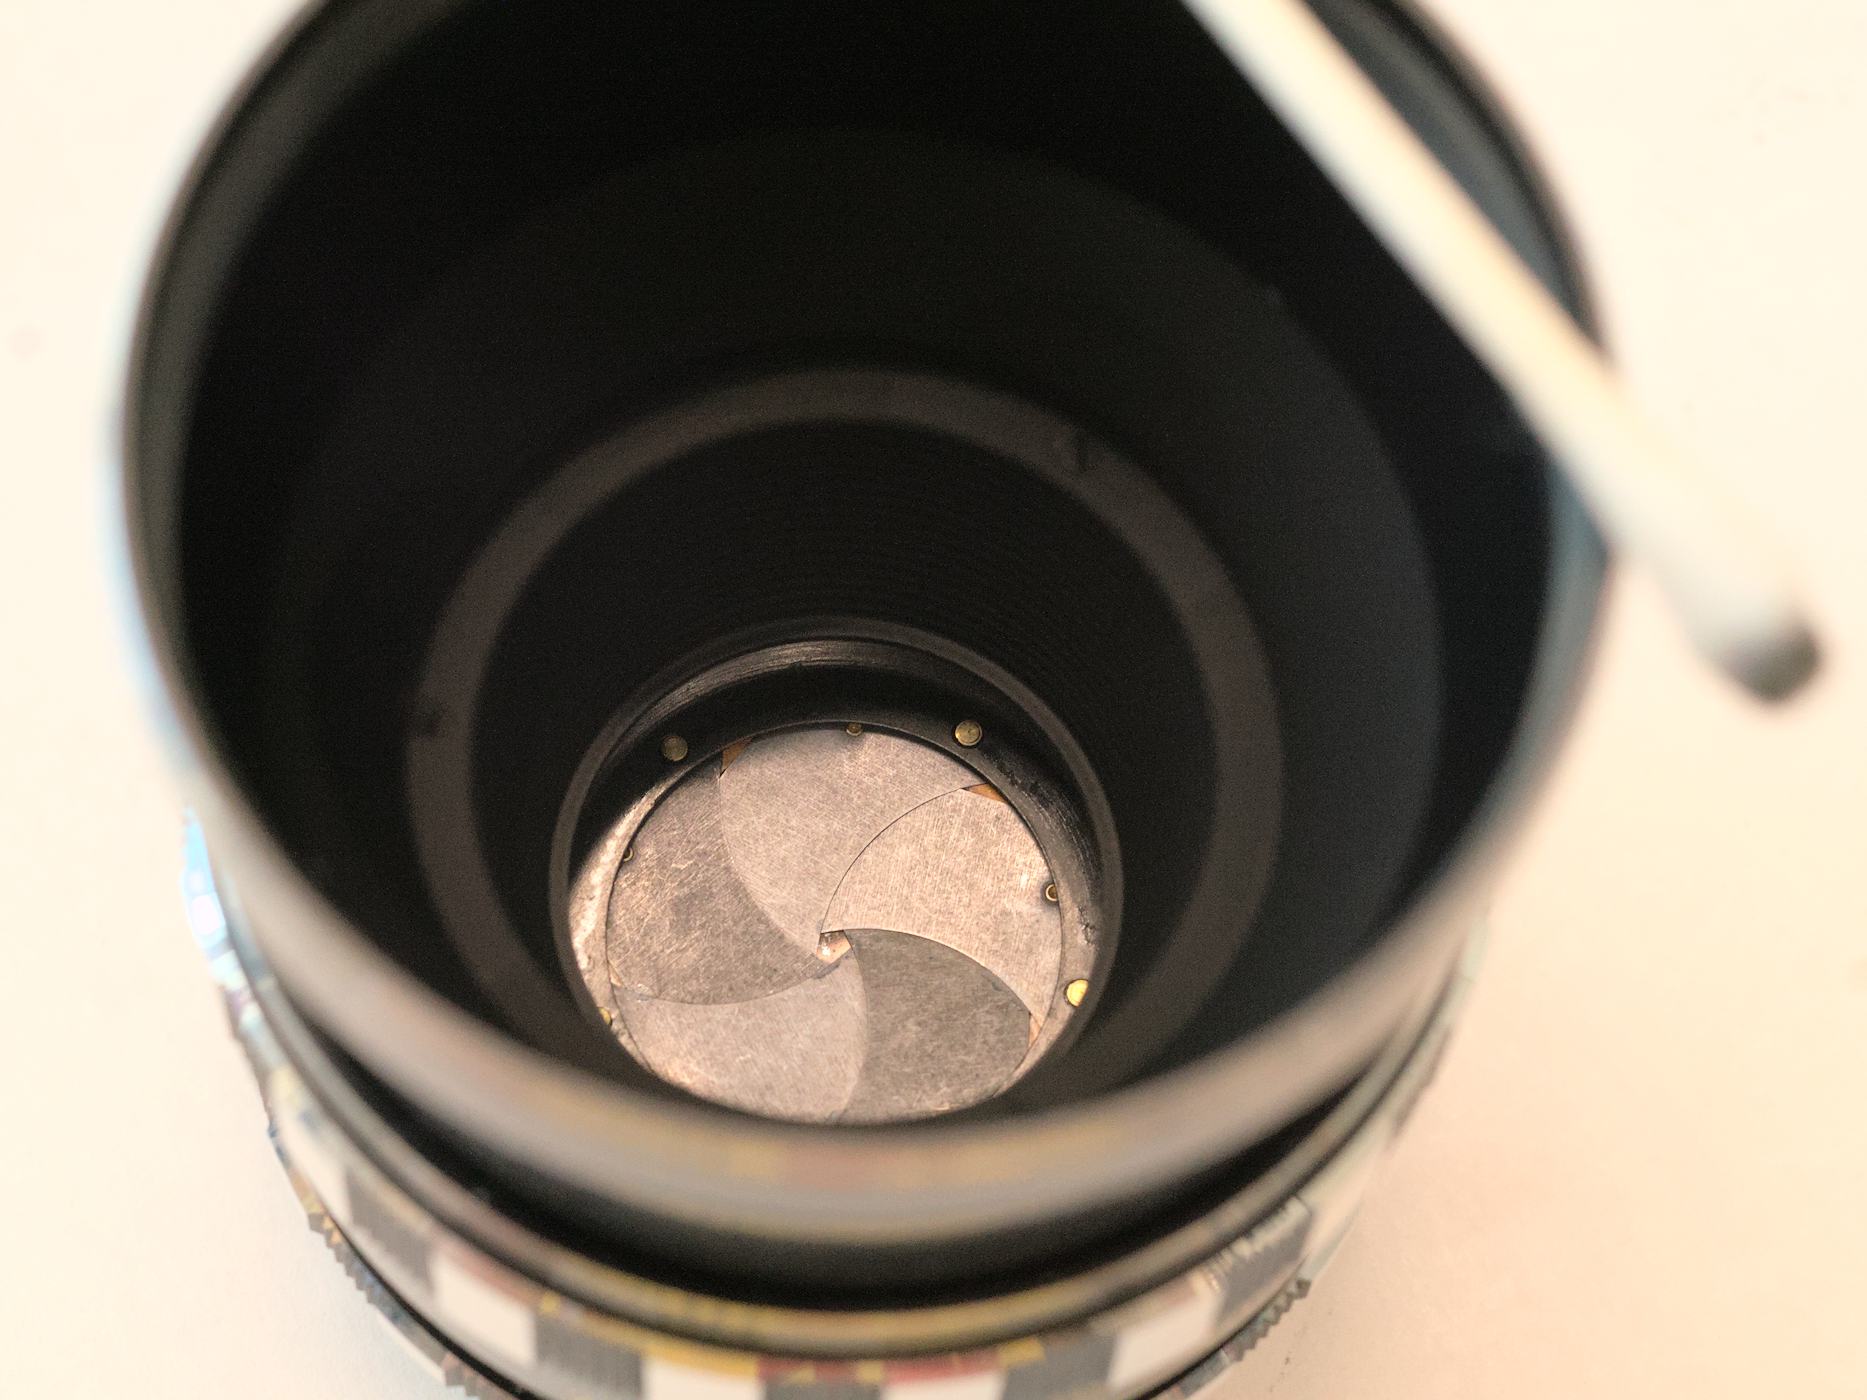
I am not a big fan of disassembling apertures, and whenever possible, I try to get away with cleaning the aperture in place. For this, I use the cotton swabs soaked in Zippo lighter fluid and move them, following the orientation of the aperture blades - in this case: clockwise. After moving the soaked swab in circles, wetting the blades, I use the aperture lever to open and close the blades, so that the fluid reaches all the internal parts.

To clean the aperture, it is very important to discard the dirty cotton swabs and repeat this over and over, until no more dirt is visible on the cotton swabs (the picture shows just a fraction of the cotton swabs that I used for this lens). As you proceed, you may notice that the aperture lever moves with less and less resistance.

I turn the messing ring back to where it was at infinity when I made the mark (approximately half a turn clockwise, as seen from the front). From there, I first turn it clockwise to see how far it can be turned before it stops (just to have a reference for later). This happens after approx. half a turn.

Then I rotate it back to the infinity position, from where I turn it clockwise until it exits. For my lens, this happens after about 12 1/3 turns.

I have no pictures of cleaning both of the helicoids. Just a few words: I start removing the big chunks of old grease with wipes or cotton swabs - and then use the cotton swabs with lighter fluid to clean them really well.


When putting the aperture piece into the helicoid, the little metal pin (yellow arrow) needs to sit in the slot.

First, the messing piece is lubed and inserted into the piece with the aperture ring. I am very carefully applying the helicoid grease. If you find that it has to much resistance, better remove some of the grease. I removed and inserted the messing piece multiple times before I was happy with the amount of grease and the way that it rotates. Then the black helicoid piece is lubed and inserted into the messing piece (again, iterating this until the amount of grease seems right) - while inserting this piece, make sure the aperture ring is set to 32 (it took me a while to figure out why the helicoid could not be inserted, until I found that it hit a piece from the aperture ring). For both helicoids, starting from the point where it exited, and back to the original position. The black helicoid is inserted and rotated back to where it started to turn freely (see above). At that point you should look through the back of the lens to ensure that its slots align exactly with the helicoid keys. Then, carefully turning the messing ring will cause the slots to "catch" the helicoid keys, and it will start to move back and forth when turning the messing ring.

After the helicoids are back in place, I reassembled the focus ring (make sure that the scratch mark is at infinity, and aligned with the ring's scale).

Screw in the next piece, and fasten the three screws.

After inserting the front glass element, the front of the lens is complete.

Reassemble the back piece such that the lever sits inside the slot.

And that's it. Quickly check that the aperture works (in "A" position it should close when pressing the silver stop-down button; and in the "M" position, the aperture should follow the value set on the aperture ring). Mine did! And it is great to see the beautiful lens with a working aperture and a smooth focus ring, looking forward to new photographic adventures!
No comments:
Post a Comment