
Next month, our local Community Theater will be performing "The Pink Panther Strikes Again", in which Dreyfus threatens to destroy the world with a Doomsday Machine - which I volunteered to build. My version is made of three parts: A base, a center piece (holding a computer screen, joystick, buttons, and lights), and a "laser gun" at the top. In Part I of this post, I finished the wooden structures for all three. The next step is to finish the skins of the three.
My other blog posts for this build:
Doomsday Machine Part I: Wooden Structures
Finishing the Center Piece
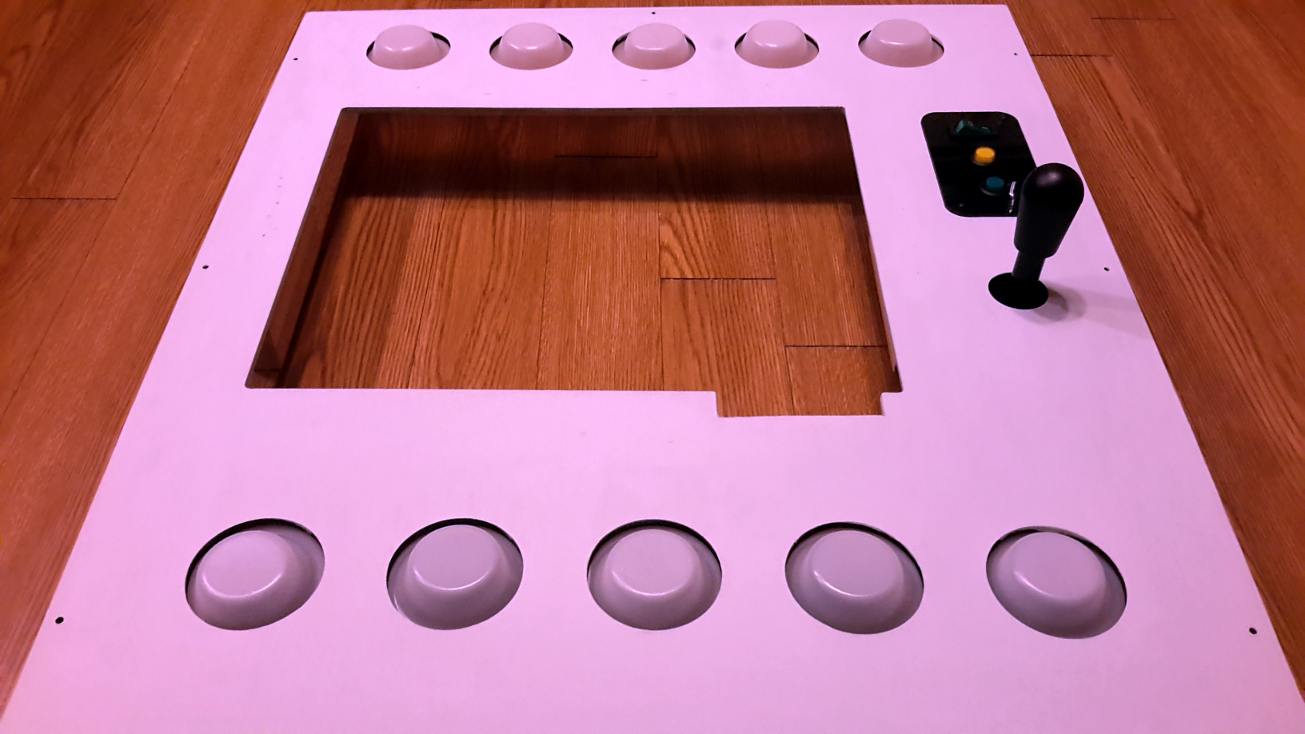
[Thu, Sept. 19] The front side with the openings for the monitor, the LEDs, joystick and switches was already cut with a laser cutter.

On the back side, four wooden bars are glued and nailed, which will keep the computer monitor in place.


The front side is then painted with light grey acrylic paint.

I cut a clear 2 1/2" x 4 1/2" acrylic plate with a laser cutter, which is painted black on the back side.

This is holding the power switch and two momentary push button switches.

And here is the Arcade joystick, that I had still lying around (for some project on my ever-increasing want-to-do list).


[Sat, Sept. 21] For some time I collected these pieces from milk gallons.

I always thought that these would make nice LED covers. Now, finally, I have an opportunity to use them.

The centerpiece is finalized by adding plywood to the top and the left and right sides, with holes in the sides for carrying.


Then it comes to painting. Personally, I come from the "Sci-Fi side". The director, however, told me that the set is supposed to look cartoon-ish. And one can't argue with the director. So, here we go...


The computer screen is mounted to the back of the front side,

and this is the final center piece.

Finishing the Laser Gun
[Sun, Sept. 22] For mounting on the Center Piece, the Laser Gun needs a foot.

The foot is made of a 2"x4" piece (cut at an angle of 15 degrees) and a piece of 1/2" plywood. The 2"x"4 is cut to fit between the two inner wheels of the Laser Gun.

They are screwed to each other and then screwed to the extensions of the two inner wheels.

The skin of the Laser Gun is made from cardboard, the one they use e.g. at Sam's Club to separate layers of kitchen towels or toilet paper.
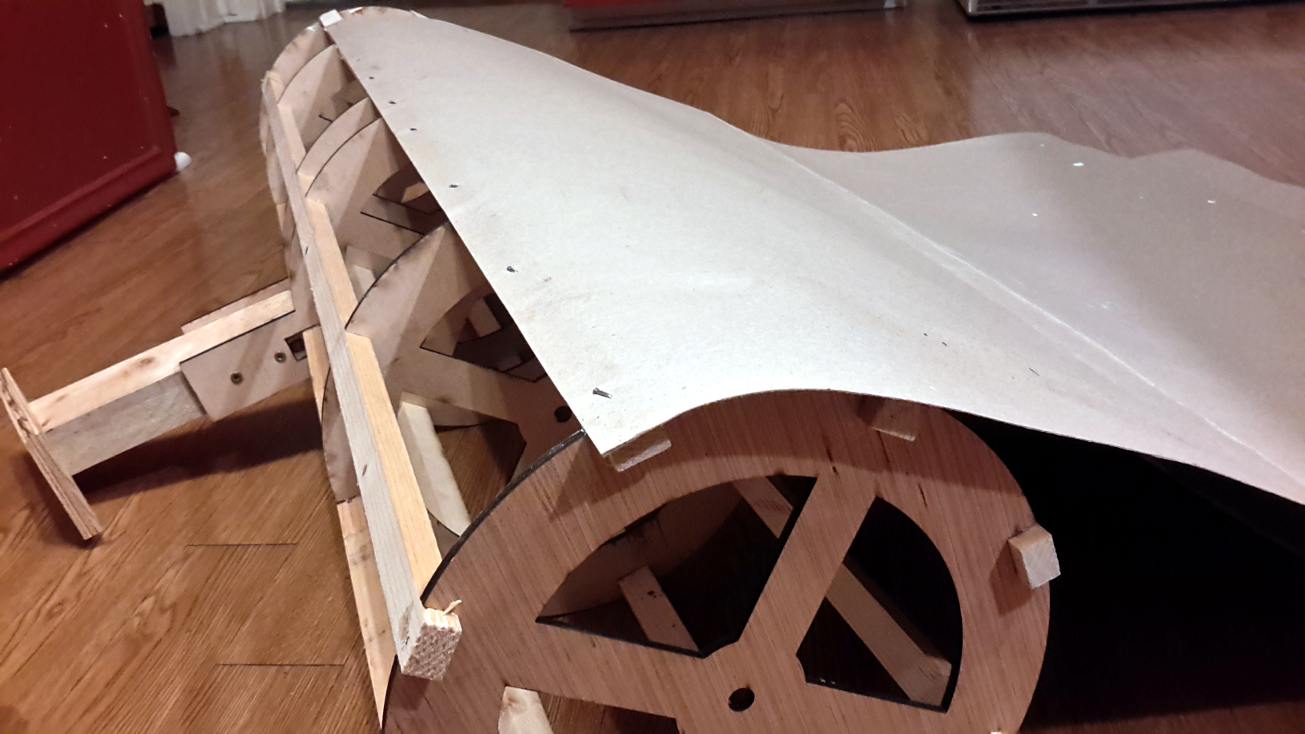


In the play, the Laser Gun is always pointing to the right side. Therefore, I can leave a little opening on the backside that will be helpful later, for running cables.
To indicate the direction in which the Laser Gun fires, I am adding two details. One is a 3/8" wooden dowel with a few round pieces glued to the front.

The other is a little cone-shaped area at the front. Both roughly resemble what is used in the movie.


That makes it look like this.


To stick to the cartoon-ish theme of the play, I am painting the gun dark blue and pink.


Something is still missing... The version from the movie has some additional details on the front. I found two of these balls from a super-size Ferrero Rocher in my big "stuff-that-may-be-useful-some-day" box.

And I attached these to the top side.

Except for some additional minor painting: This is the final Laser Gun enclosure.
Finishing the Base
I thought that the whole Doomsday Machine looks better if it was a little taller. Also, the base would look more interesting, if it was raised a little from the ground. So, I added a few 2"x4" pieces to the bottom side.


This adds a little more weight (well, actually quite a bit...) which may make the whole machine a little more stable.
[Sun, Sept. 29] Then I cut six trapezoids from corrugated cardboard (two elements on the back side will be left open).

These are glued to the sides.

And here is the first appearance of the base on the stage.

The finished base will be painted by somebody else. That means that I am now done with the enclosure, and can start to focus on the electronics and the programming of the Arduino and Raspberry Pi.
Other posts on the Doomsday Machine:
No comments:
Post a Comment