The Meyer-Optik Görlitz Oreston 50mm f/1.8 lens is a legendary lens. It is famous for its painterly bokeh wide open, and for it sharpness when stopped down. The early versions of this lens are in the "Zebra" style. My lens was made around 1967.
Usually, the old grease became stiff, making the focusing hard - plus: oil on the aperture blades causes the aperture to get sticky and close either slowly or not at all.
General Recommendations
First, you need tools like a lens spanner and (good!) screw drivers. For cleaning the metal surfaces, I am using cotton swabs and high percentage Isopropyl Alcohol (I got 91%) for all metal surfaces and the glass - and lighter fluid (Zippo) for cleaning the old grease in the helicoids). You also need helicoid grease.
I strongly recommend to take photos of every single step along the way. Whenever I take off a piece, I first try to understand how it was connected and what it did, and then I clean immediately all of its accessible surfaces with alcohol-soaked cotton swabs.
Disassembly
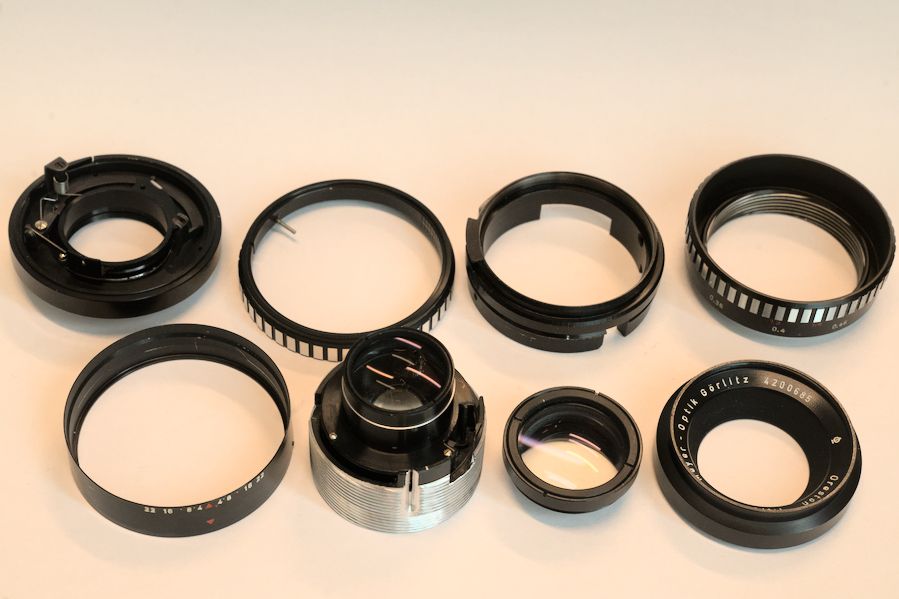
Here, I show the pictures of the disassembly and cleaning of my Zebra Oreston.

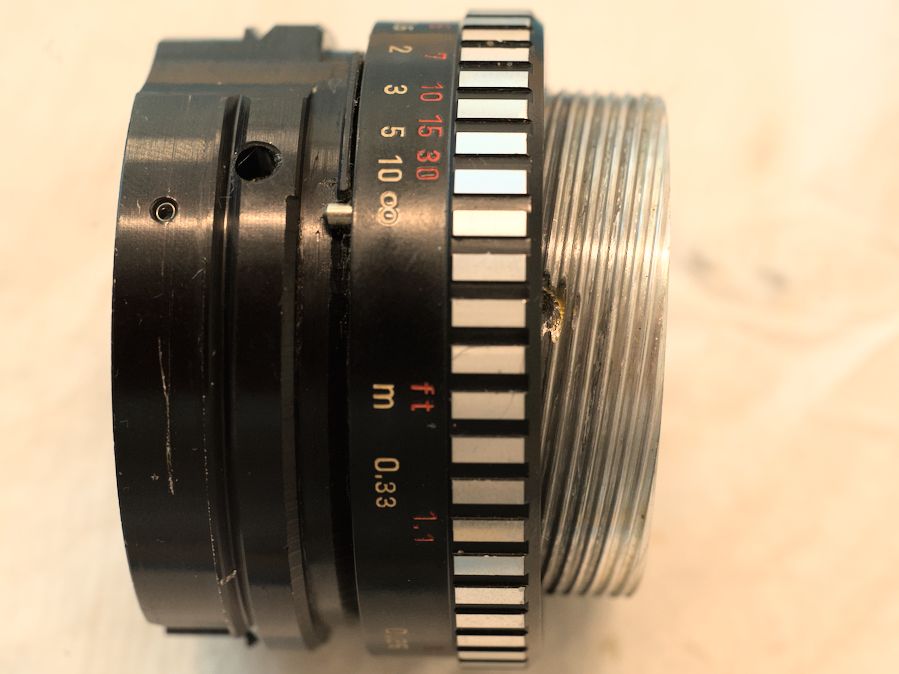
It all starts with loosening the little screw (between the serial number and "Oreston") - just loosen it, don't take it out. Then you can unscrew the front piece by hand and, with a lens spanner also the front glass piece.
On the back side, removing the three screws lets you take off the back piece and then, the aperture ring (don't loose the little metal ball that comes out - it sits at the top, where the aperture values are).
Loose the little screw on the front - plus the one on the opposite side.
Now is a good time to set the focus to infinity. And when taking off this piece, make sure you're not losing the two springs.
Once the springs and the two metal pieces (the helicoid keys) are out, the helicoid can rotate freely
Warning! There are three small grub screws on the left. And it seems like you could take these out to separate the rear glass and to get access to the rear side of the aperture. But don't open these. In fact, these grub screws are used to align the rear optics - and once removed, you will never be able to align the optics again, as this requires special tools.
Before taking out the coarse helicoid, remember where it was (take notes & pictures). Then slowly rotate it out and remember exactly where it became free.
This piece holds the aperture mechanism. If you wanted, you could take out the aperture blades, clean them (carefully!), and reassemble them. The last step can be difficult and time consuming - that's why I always try to clean the aperture blades in-place. I put lighter fluid on a cotton swab and rotate it around the closed aperture - open and close the aperture - and repeat this 20-40 times (always using new cotton swabs) until it looks clean and moves without resistance.
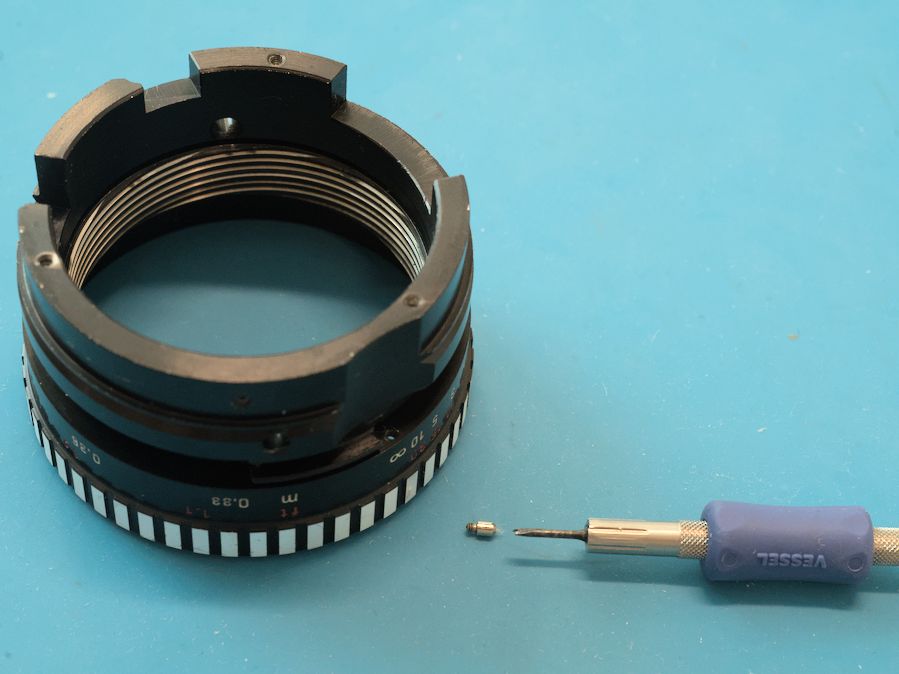
This screw sets the limits for the focus ring.
You have to turn the focus ring slightly, so you can access this screw.
Take it out.
Before unscrewing the fine helicoid, I always test (and write down) how many turns it could be inserted (i.e. rotated clockwise) until it comes to stop, starting from infinity - and then, how many turns it takes to come out, and where
exactly it comes out.
Cleaning both helicoids with 91% IPA and/or lighter fluid.
Clean!
All the pieces - without disassembling the aperture.
Using small amounts of lube.
Insert the fine helicoid.
And the coarse helicoid too.
When putting back the backpiece, make sure that the two slots of the bottom piece (on the left: at the bottom and on the right) both grab the corresponding pins (on the right: metallic pin on the bottom, and the pin on the left).
Testing: Set the aperture ring to any small value f/8-f/16 and check if pressing the button on the side and the pin near the glass is causing the aperture to close.
Before putting the front glass back, I took out the front lens and cleaned everything (with IPA and lens wipes).
That's it - it looks and feels (almost) as if it was 1967 and it just arrived from the factory!
More of my lens repair tutorials can be found here.


No comments:
Post a Comment